
Manually launching an EC2 instance from the AWS console can be time-consuming especially if you need to do it again and again.
That is where Terraform comes in. It helps you automate the process so you can launch EC2 instances quickly, with just a few commands.
In this blog, I will show you step-by-step how to use Terraform to launch an EC2 instance on AWS. Even if you are new to this, don’t worry I will keep it simple.
What You’ll Need Before You Begin
- Before we begin, make sure you have these things ready:
- An AWS account
- IAM User Access Key and Secret Key
- Terraform installed on your system
- AWS CLI installed and configured
Step 1: Create a Project Folder
- First, open your terminal and make a new folder where you’ll store your Terraform files:
mkdir terraform-ec2
cd terraform-ec2
Step 2: Create a Key Pair
Now, we will create key-pair for instance from local system using ssh-keygen which mean we are going to use local system key for ssh .
- First go to your local system and generate key
ssh-keygen
- Enter your key name in my case I provide tf-ec2-key because we will use this in ec2.tf file
- leave as default remaining setting
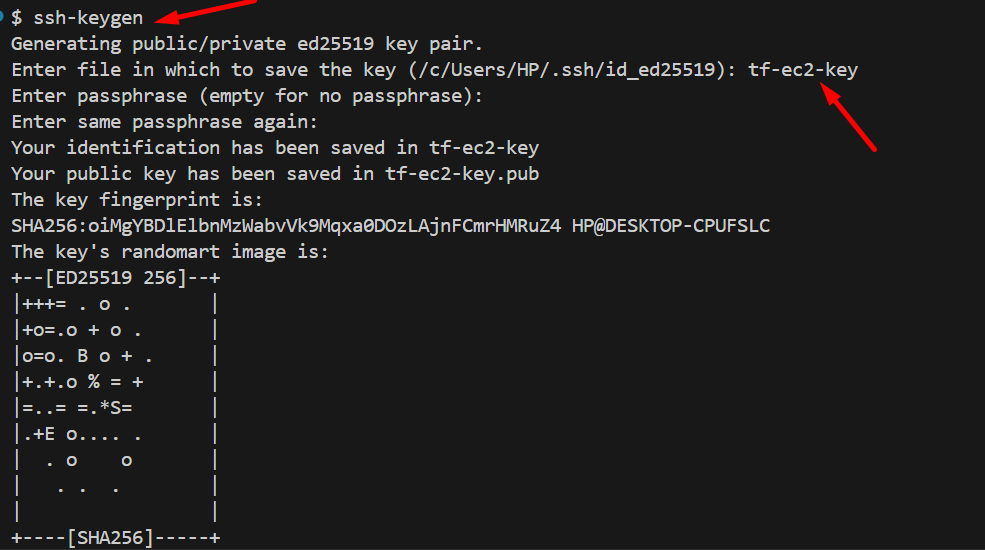
- After create keygen you will see in your syetm there will be two key
- tf-ec2-key
- tf-ec2-key.pub
- Now, we will use .pub key in our ec2.tf file
Step 3: Create Terraform Files
- We’ll create three files:
- First create ec2.tf where we can describe all the resources to need.
- second file for provider where can define provide name like aws
- third one is outputs.tf where we can get public ip of instances for ssh
- Paste this code into ec2.tf file
# Key Pair
resource "aws_key_pair" "tf-key-pair" {
    key_name = "tf-key-pair"
    public_key = file("tf-ec2-key.pub")
}

# VPC && Subnet
resource "aws_default_vpc" "default" {

}

# Security Group
resource "aws_security_group" "tf-security-group" {
    name = "tf-SG"
    description = "This SG from TF"
    vpc_id = aws_default_vpc.default.id
    tags = {
      name = "tf-SG"
    }
    # Inbound Rule
    ingress {
        from_port = 22
        to_port = 22
        cidr_blocks = ["0.0.0.0/0"]
        protocol = "tcp"
        description = "SSH Access"
    }
    ingress {
        from_port = 80
        to_port = 80
        cidr_blocks = ["0.0.0.0/0"]
        protocol = "tcp"
        description = "HTTP Access"

    }
    # Outbound rule
    egress {
        from_port = 0
        to_port = 0
        protocol = "-1"
        cidr_blocks = ["0.0.0.0/0"]
        description = " Allow All access"

    }
}

# EC2 Instances
resource "aws_instance" "tf-instance" {
    key_name = aws_key_pair.tf-key-pair.key_name
    security_groups = [ aws_security_group.tf-security-group.name ]
    instance_type = "t2.micro"
    ami = "ami-0f9de6e2d2f067fca" #ubunu image

    # root storage in EC2
    root_block_device {
      volume_size = 15
      volume_type = "gp3"
    }
    tags = {
      name = "tf-instance"
    }
}
- Paste this code into provider.tf file
# AWS Provider
terraform {
  required_providers {
    aws = {
      source = "hashicorp/aws"
      version = "6.0.0-beta3"
    }
  }
}
provider "aws" {
  region = "us-east-1"
  # Configuration options
}
- Paste this code into outputs.tf file
output "instance_id" {
  value = aws_instance.tf-instance.id
}

output "public_ip" {
  value = aws_instance.tf-instance.public_ip
}
Step 4: Initialize Terraform
- Run this command to prepare your project:
terraform init
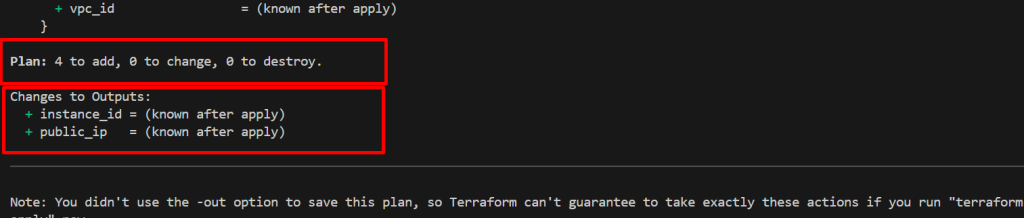
Step 5: Check What Terraform Will Do
- This step shows what changes Terraform will make:
terraform plan
Step 6: Apply Terraform
- Now actually create the instance using terraform apply
terraform apply
- Type
yeswhen it asks for confirmation.
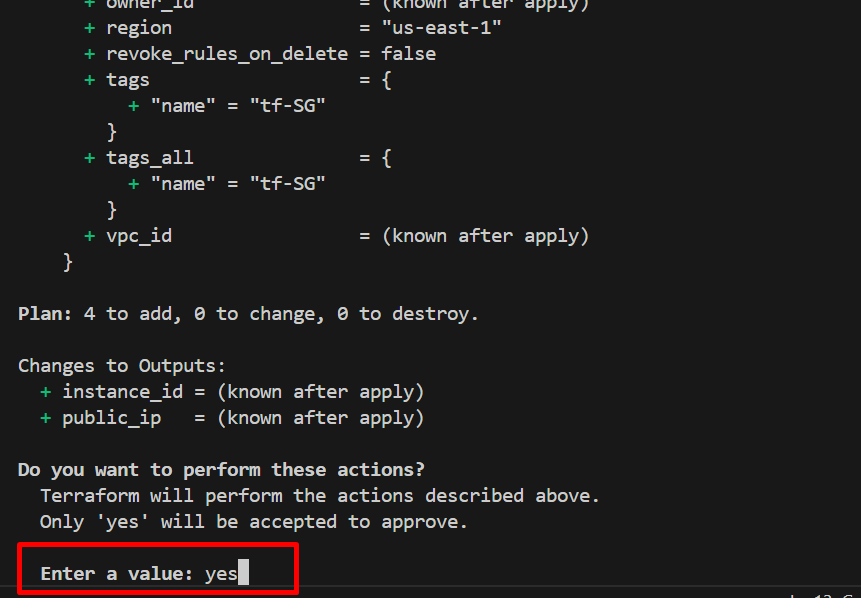
- Once done, Terraform will show you the instance ID and public IP address.
- Now, copy the public IP address and try to access instances using ssh
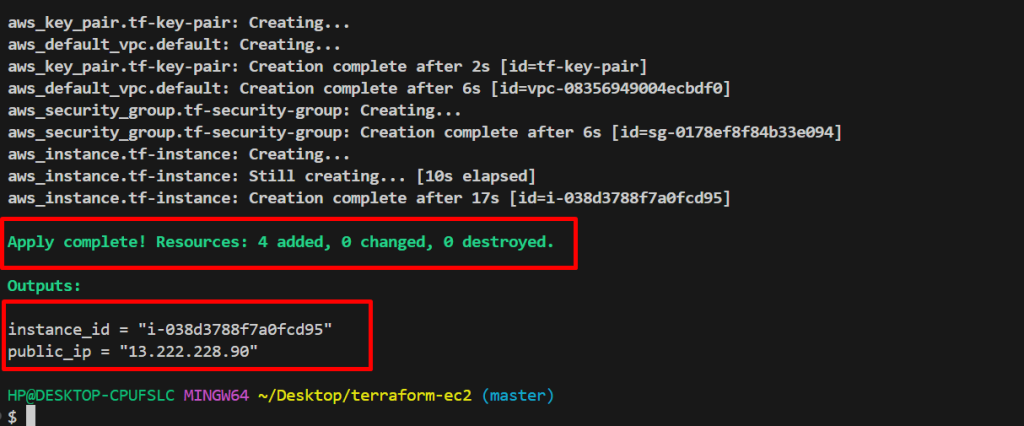
- Wow successfully completed your ec2 instance setup. Now let’s move ahead
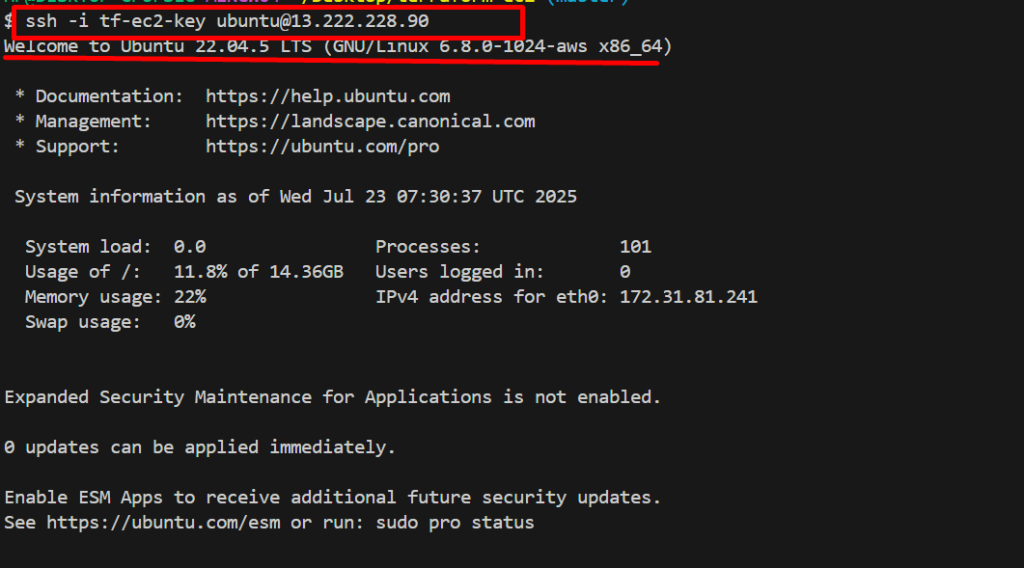
Step 7 : Access EC2 Instance
- copy the public IP address of your instance.
- Now, you can access use this command
- ssh -i <private-key> <username@public-ip>
ssh -i "tf-key-pair" ubuntu@13.222.228.90
Step 8: Delete Resources
- Delete all the resources just only type one command
terraform destroy

- Type yes when it asks for confirmation.
Congratulations! You have successfully accessed your EC2 instances without using the AWS Management Console. Now, you can easily update, create, and deploy applications directly from your local machine
Note: Don’t forget to delete resources

Interesting analysis! Seeing a lot of potential in Philippine online gaming – especially platforms prioritizing a smooth user experience. Considering a vipph download for a better, more secure play – VIP treatment sounds good! 🤔
https://shorturl.fm/9t4An
https://shorturl.fm/ARL40
https://shorturl.fm/mxdzj
https://shorturl.fm/IPl9r