Introduction
Deploying applications manually is slow, repetitive, and risky especially when working in cloud environments where speed and scalability matter the most.
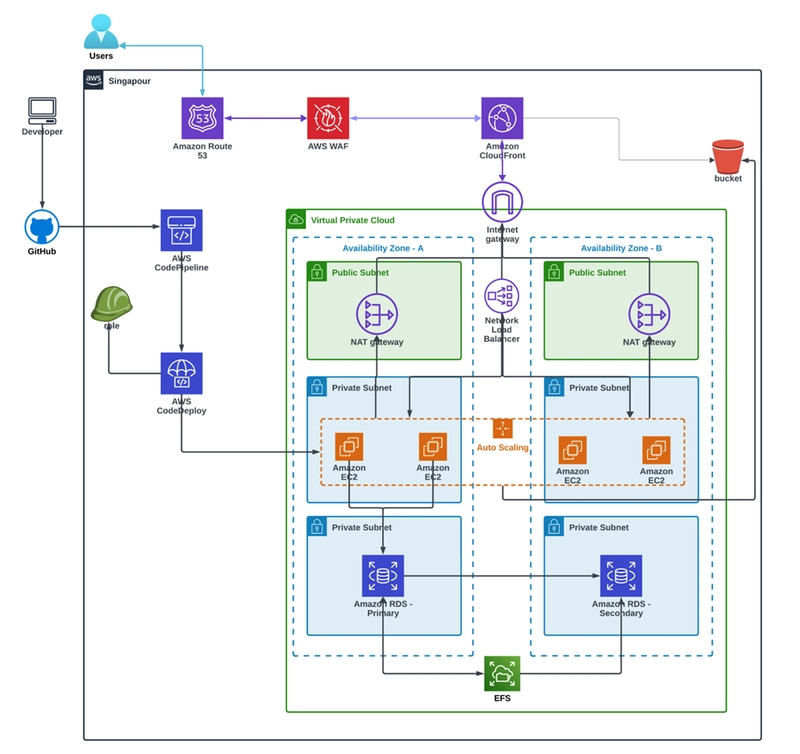
In this project, I built a fully automated AWS deployment pipeline that takes application code directly from GitHub and deploys it into a scalable production environment using AWS services.
The complete workflow includes:
- GitHub for source control
- AWS CodePipeline for automation
- AWS CodeDeploy for deployments
- EC2 Auto Scaling Groups for scalability
- Network Load Balancer for traffic distribution
With this setup, every new GitHub push automatically triggers deployment without requiring manual server access.
This architecture reflects how modern DevOps teams manage production-grade applications in real-world cloud environments.
Why Modern Applications Need CI/CD Automation
In today’s digital landscape, businesses need to deploy applications quickly and seamlessly. Utilizing a CI/CD (Continuous Integration/Continuous Deployment) pipeline allows us to automate the process from development to production. Here are some key benefits:
- Speed and Efficiency: CI/CD accelerates the development and deployment process, enabling developers to release code faster.
- Quality Assurance: Automated testing helps identify bugs and issues early, improving the overall quality of the application.
- Scalability: With auto-scaling features, applications can adjust resources based on demand, optimizing resource utilization and controlling costs.
- Reliability: Load balancing efficiently distributes traffic, minimizing downtime and enhancing user experience.
- Cost-effectiveness: Automated processes and resource scaling lead to lower operational costs, as you only use resources as needed.
Now, Let’s start with practical

First, we have to create Launch Template
Go to launch template under Instances and click on create launch template
- Launch Template Name: write your launch template name
- Template version description: v1
- In OS and Images tab: Click on quick start and select your OS according to your requirement
- In instances type: Select Free tire [t2.micro] or you can select your requirement
- Key pair: Create your key pair and keep it securely
- Network setting: leave as execute
- Firewall (Security Groups): Select create security group
- Security Group Name: write security group name
- Description: allow ssh and http (s)
- VPC: you can select your own VPC or leave as execute
- Click on add security groups rule and add three security rules:
- Type: ssh [22] / http [80] / https [443]
- Source type: Anywhere
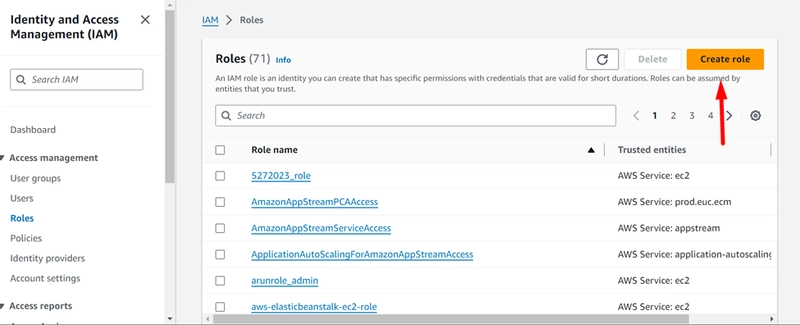
- Expand Advance detail In IAM instance profile: Select new IAM Profile and create role
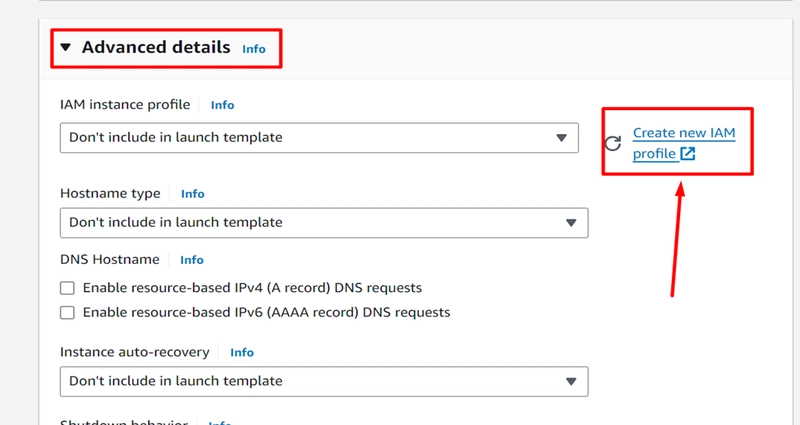
- After click a new IAM profile
- Select trusted entity: AWS Service
- Use Case: EC2 and then click on Next button
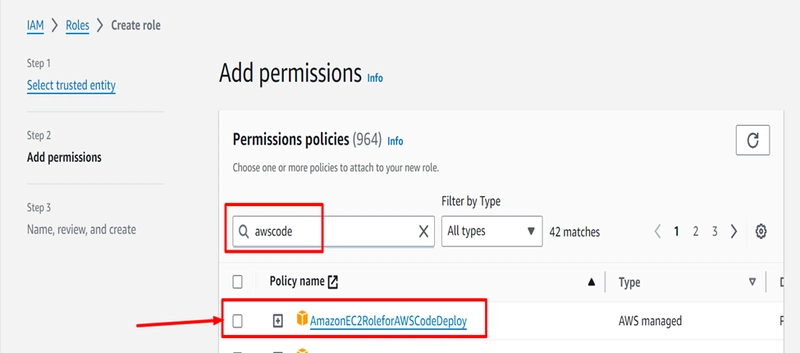
- Add permission tab: search codedeploy and select
- AmazonEC2RoleforAWSCodeDeploy
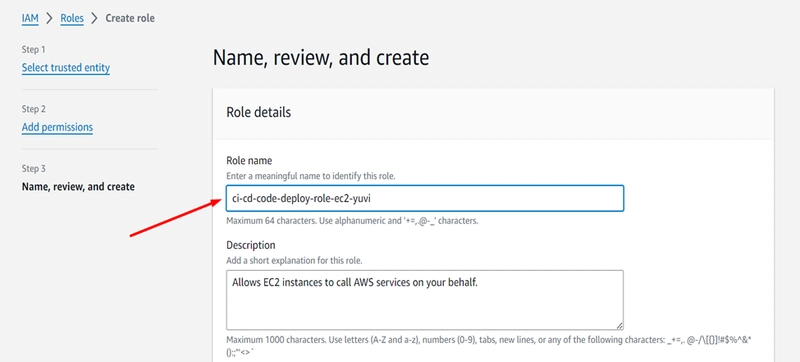
- In role detail tab: write role name and description then click on create role.
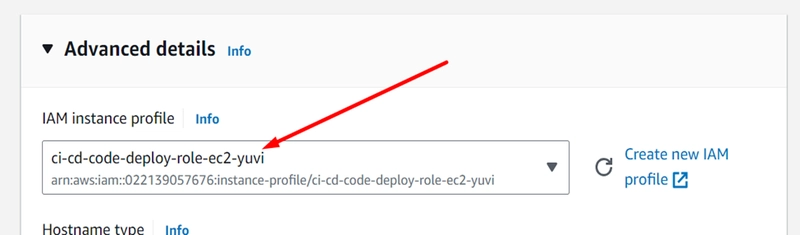
- After create role come back advanced details under launch template and select your role
- Scroll down and search for User data and write some script:
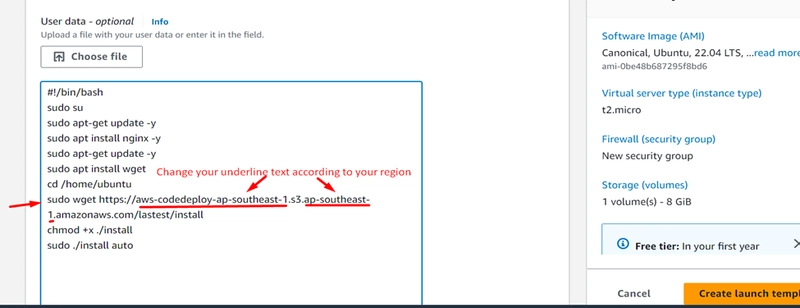
NOTE: Change the underline text according to your region
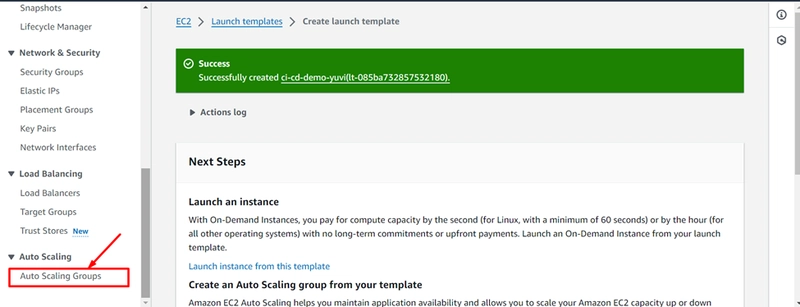
- Now, Create launch template
After launch template select Auto scaling Groups
- Auto scaling configuration
- Name: write your ASG name
- Launch Template: Select your template
- Version: Latest (1)
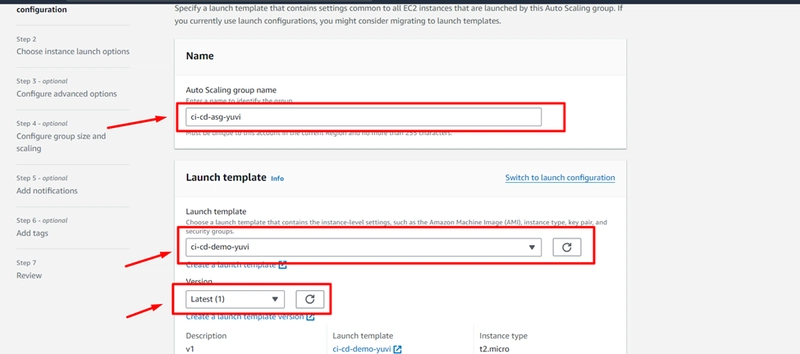
- Click on next
- Under Network setting
- Select VPC: select default VPC or select your own VPC
- Availability Zones and subnets: Select minimum two subnets like 1a and 1b

- Click Next
- Under Load balancing tab:
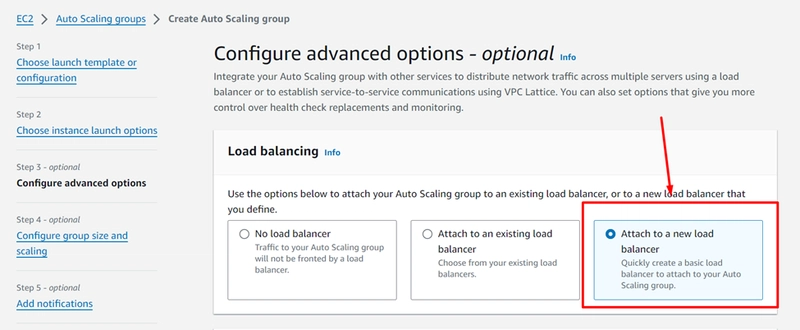
- Select Attach a new load balancer
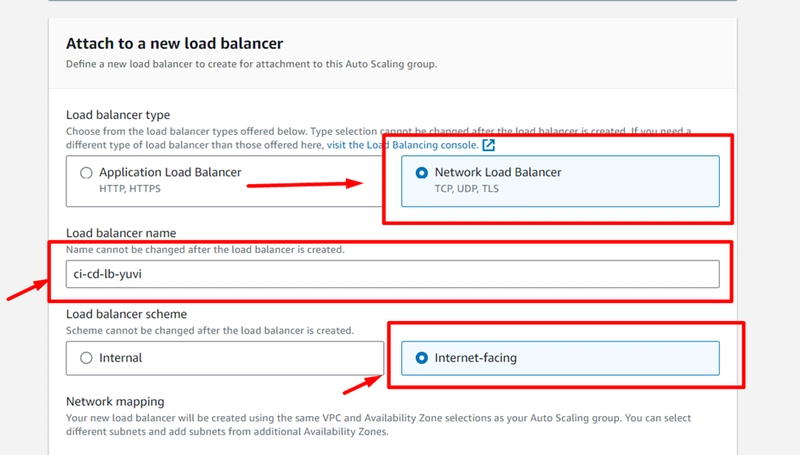
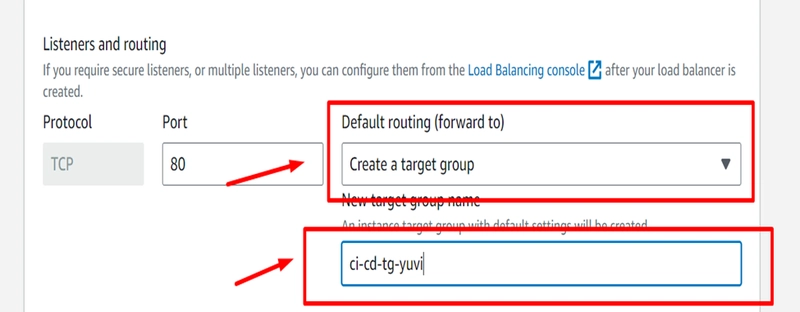
- Under Listeners and routing:
- Protocol: TCP
- Port: 80
- Default routing (forward to): create a target group
- New target group name: Give your TG name
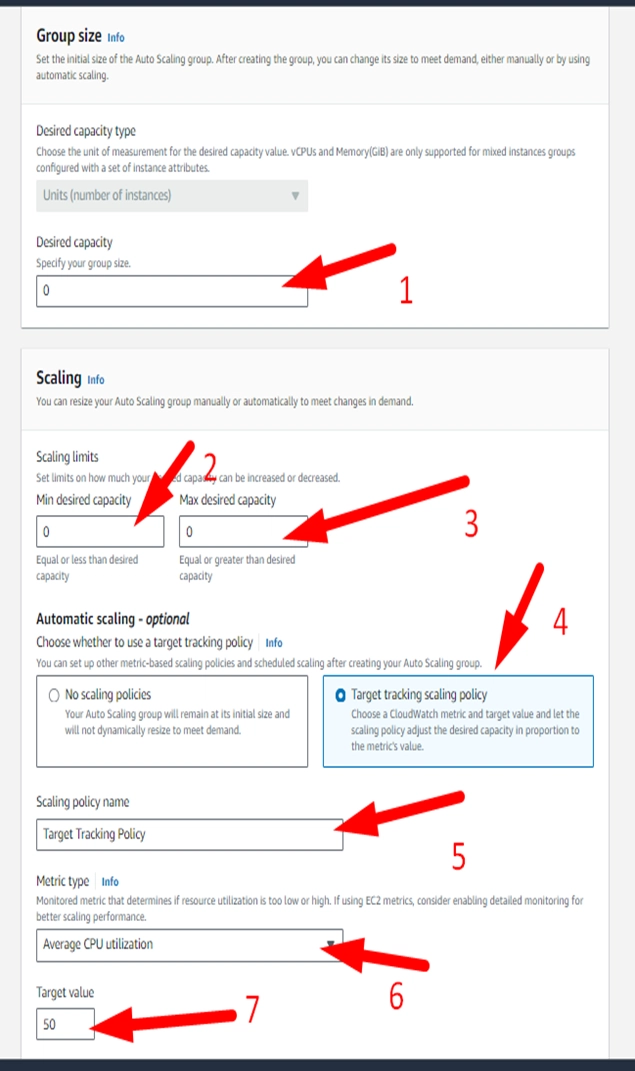
- Under Group Size
- Desired capacity: 0
- Min desired capacity: 0
- Max desired capacity: 0
- Select target tracking scaling policy
- Scaling policy name: Target tracking policy
- Metric type: Average CPU utilization
- Target Value: 50
- Then click on create button and you can see there is no instances and desired capacity.

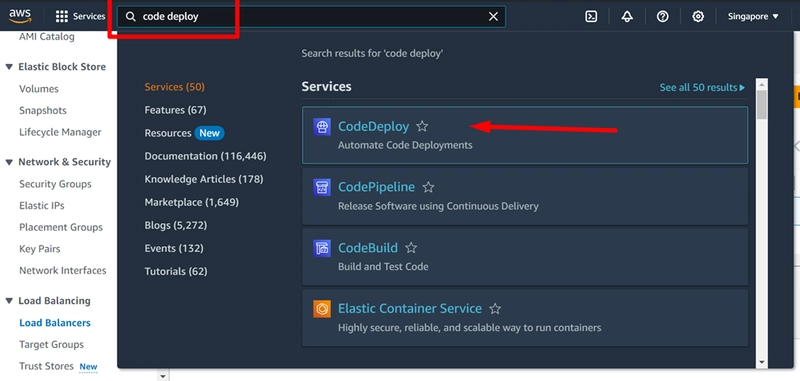
- Now, go to CodeDeploy
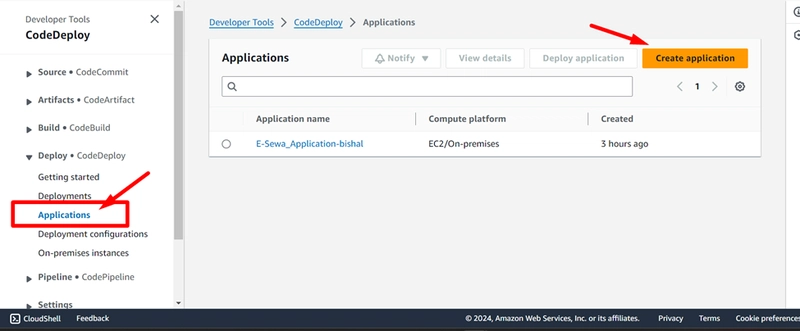
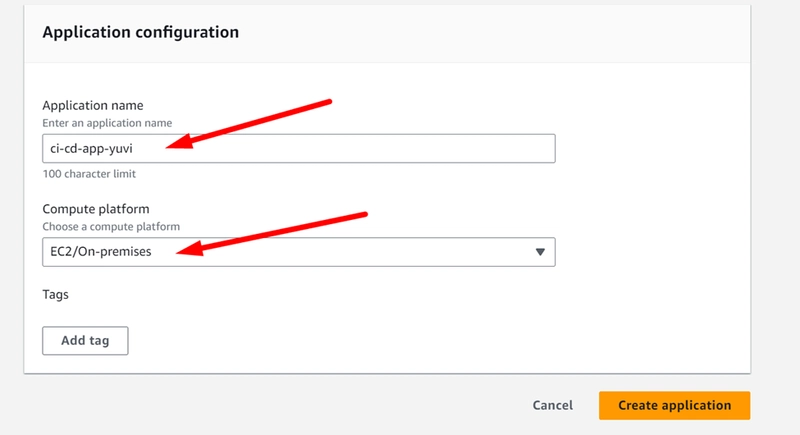
- Select Application under deploy tab and create application
- Under Application Configuration:
- Application name: write your application name
- Compute platform: Select EC2/On-premises
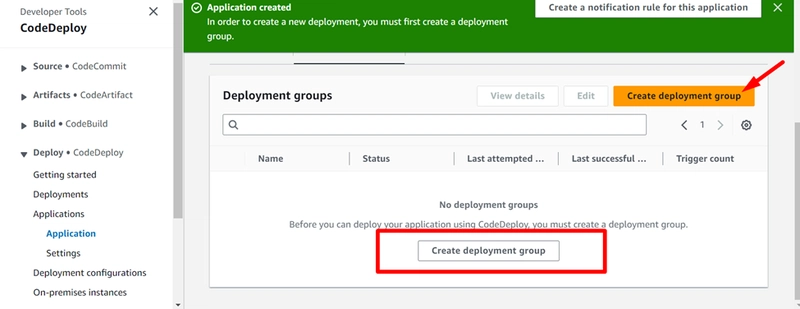
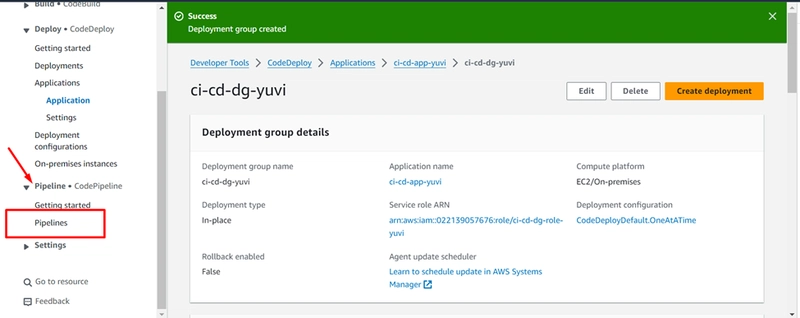
- Now, after create application click on create deployment group
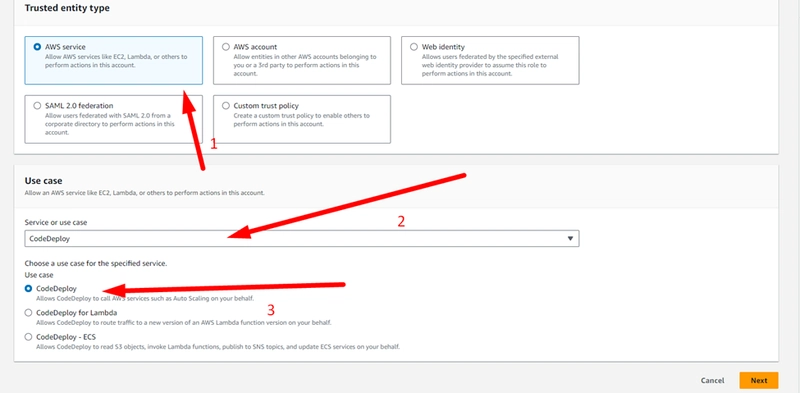
- In trusted entity type > select AWS service
- In use case > select CodeDeploy
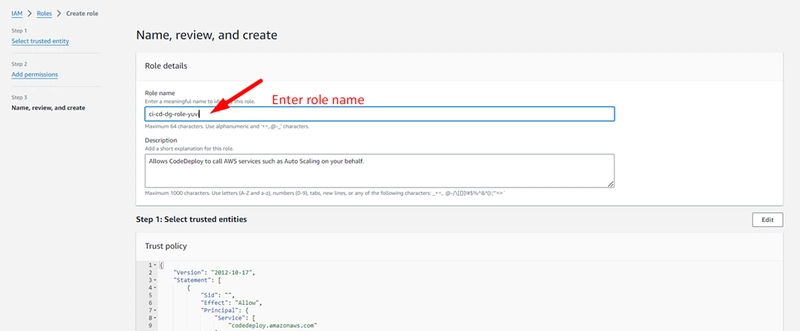
- Enter the role name
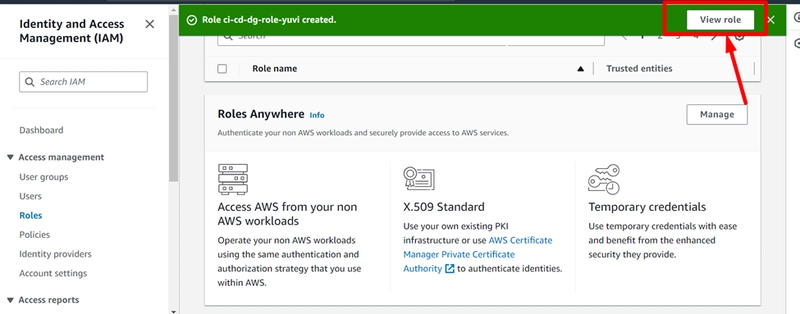
- Select View role
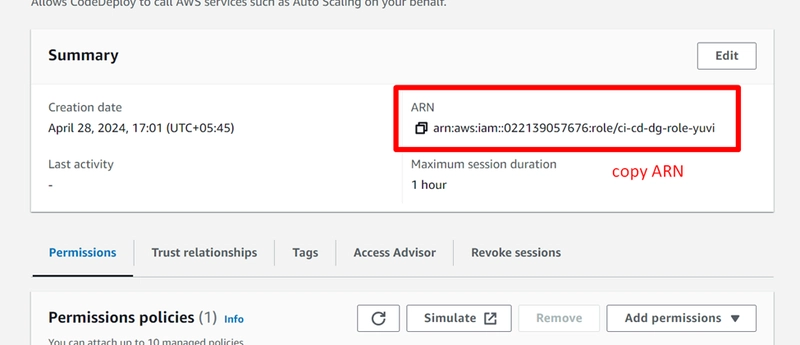
- then copy the ARN link of role
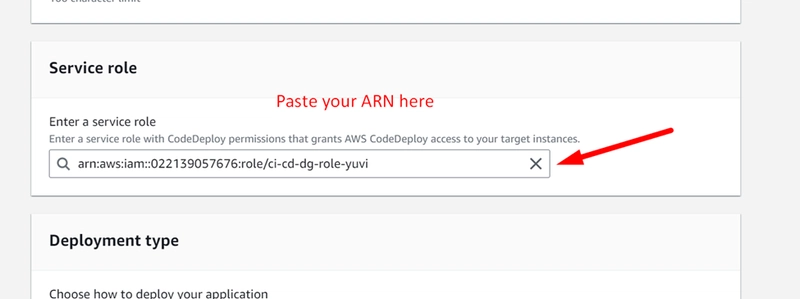
- Paste your ARN in service role tab under Deployment group
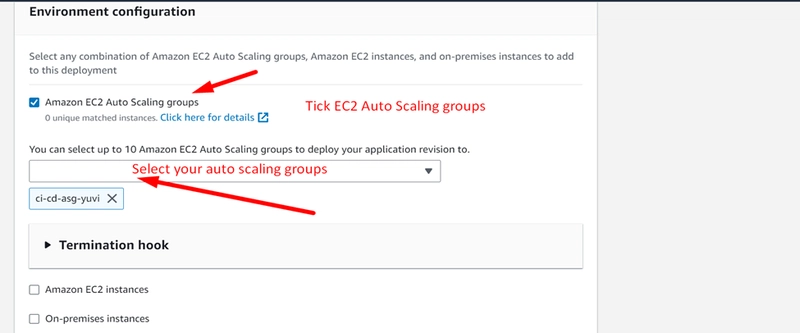
- Now Under Environment Configuration tab
- Mark on Amazon EC2 Auto scaling Groups
- Select your ASG
- In Deployment Setting
- Deployment Configuration : Select CodeDeployDefault.OneAtAtTime
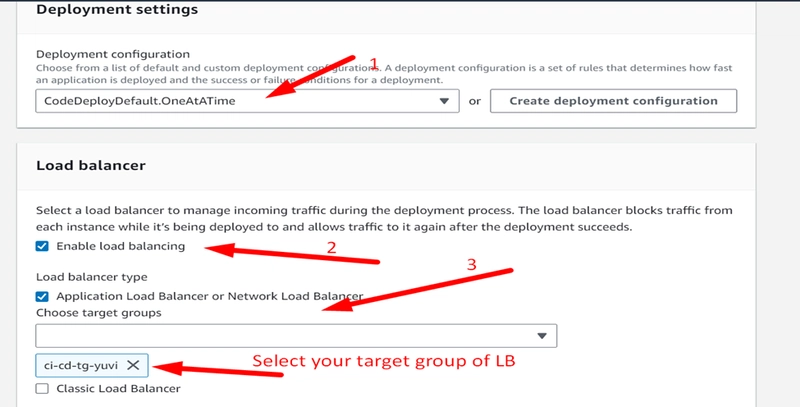
- In Load Balancer Tab
- Mark on Enable Load balancing
- Select your target group of Application LB or Network LB
- Now, Go to Pipelines under pipelines side nav bar
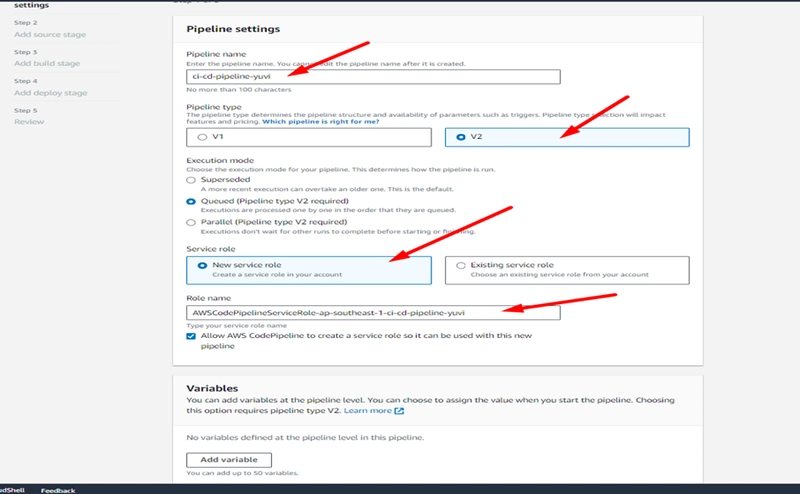
- In pipeline setting
- Pipeline name: write your name
- Pipeline type : Select v2
- Execution mode: select Queued (pipeline type V2 required)
- Service role: Select New service role
- Role name automatically appear in your role name box
- Under source Tab
- Source Provider: GitHub (Version 2)]
- Click on connect to GitHub
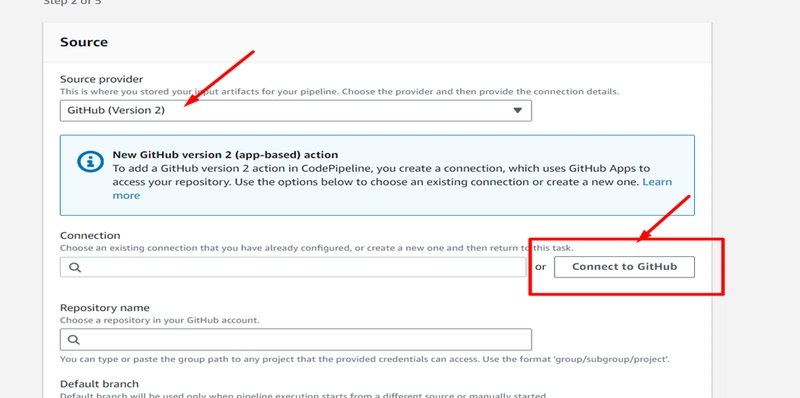
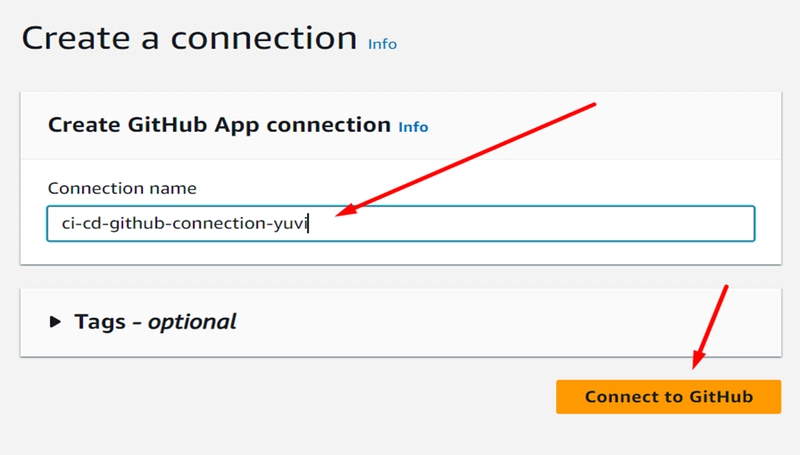
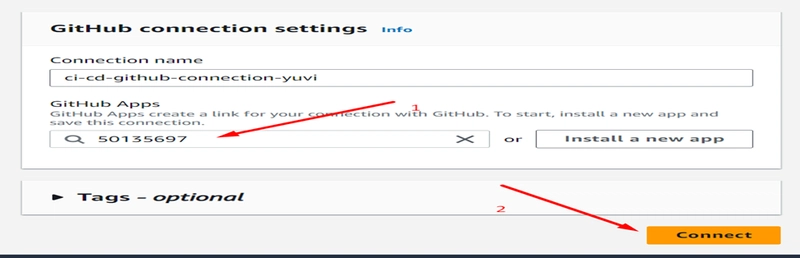
- Create Connection
- Connection name: Give your connection name
- Then click on connect to GitHub button
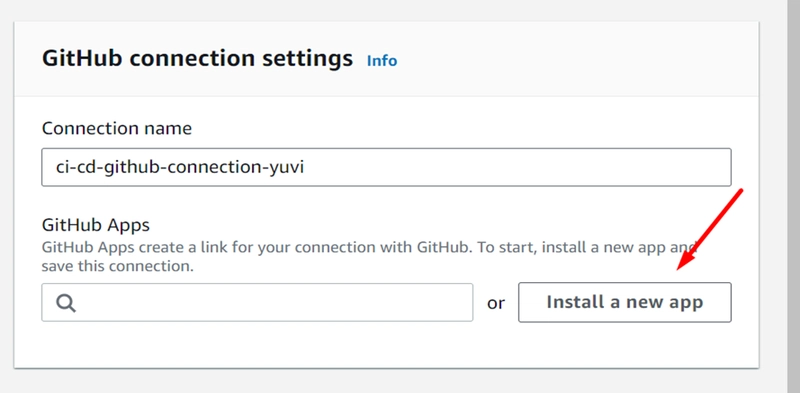
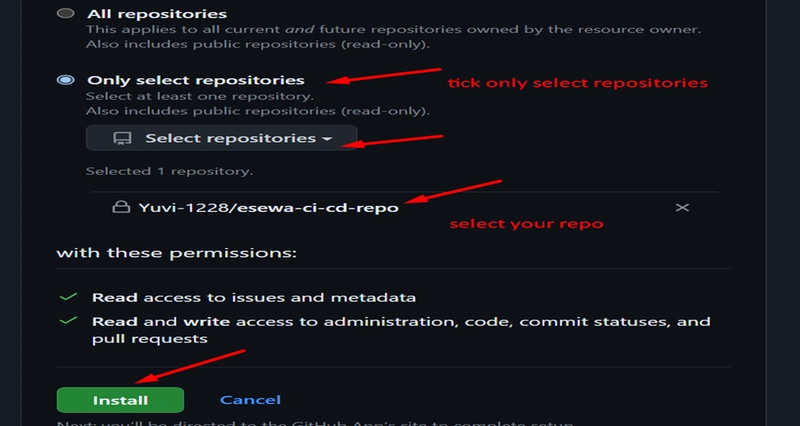
- Click on Install new app
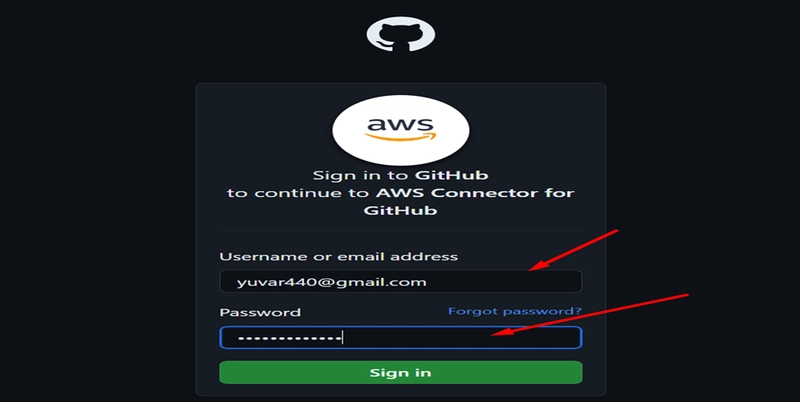
- Now, Login github
- Mark on Only select repositories
- Select your repositories
- Then click on install
- now, click on connect
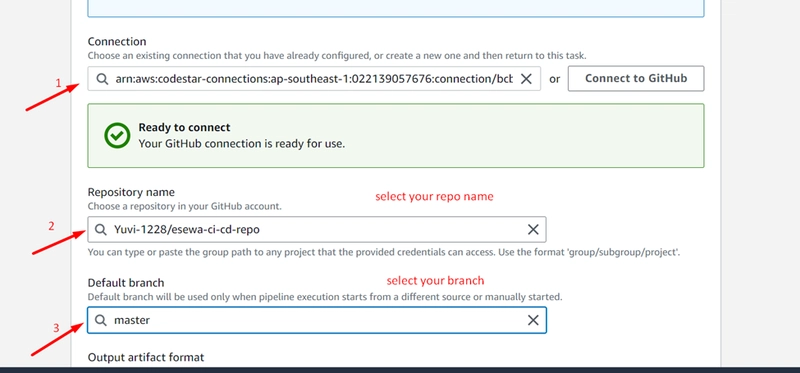
- ensure your repository name and default Branch is correct
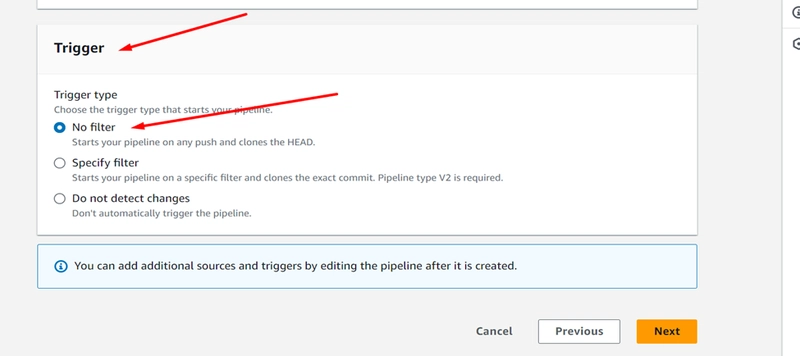
- Under Trigger Tab
- Select No filter
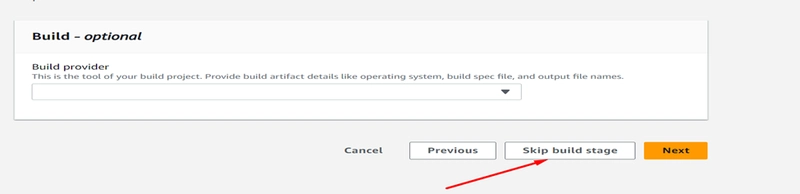
- Skip Build Stage
Now, Configuration Deploy
- Deploy provider: AWS CodeDeploy
- Region: Asia Pacific (Singapore)
- Application name: select your Application name
- Deployment group: select your Deployment group
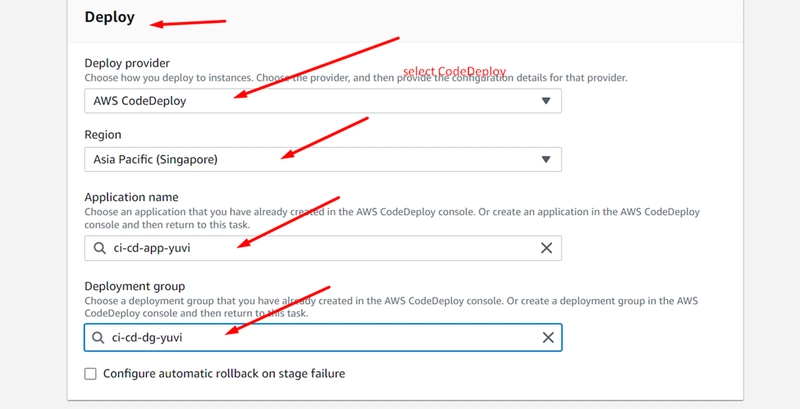
- Click on deploy button
- Then, your code will be automatically deploying
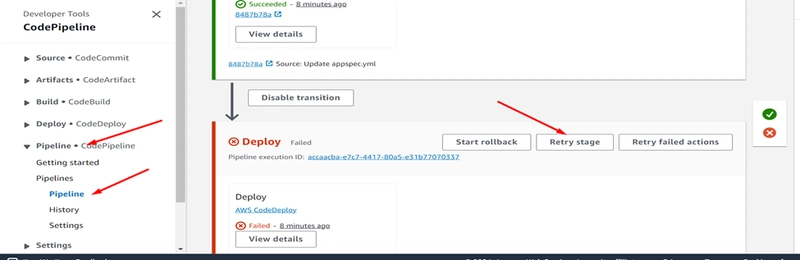
- If there will error given as a picture below So, we have to configure auto scaling desired capacity.

- Search EC2 > select auto scaling group
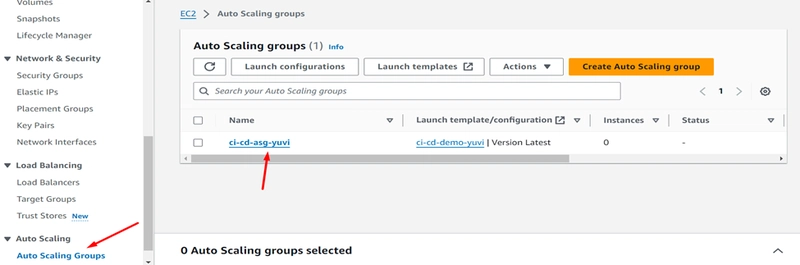
- select your ASG and change desired capacity value given as a picture below
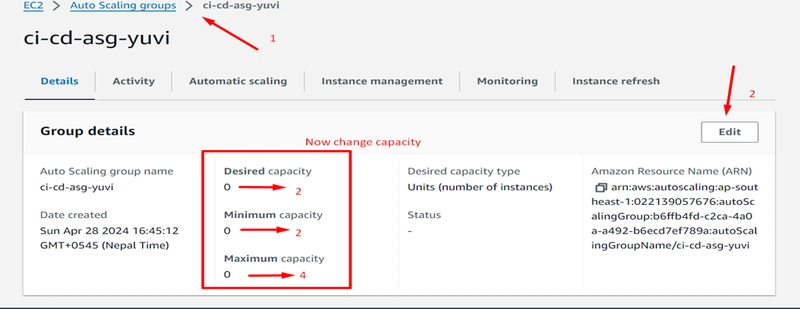
- again, go to CodePipeline and retry stage
- After deploy go to load balancer dashboard and copy DNS name and paste it any browser your application will be working.
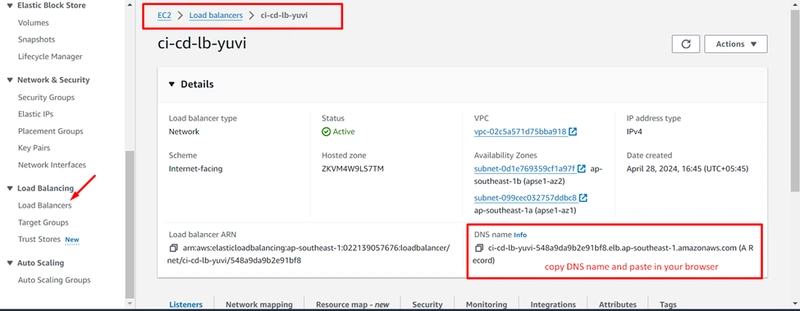
Your application is ready now
Automation is no longer optional in modern cloud infrastructure. A properly designed CI/CD pipeline improves deployment speed, reduces operational errors, and creates a more reliable production environment.
By integrating GitHub with AWS CodePipeline, Auto Scaling, CodeDeploy, and Load Balancing, we can create a scalable deployment architecture capable of handling real-world production traffic.
This project is not only useful for learning DevOps practically but also serves as a strong portfolio project for cloud engineers and AWS enthusiasts.